My Smart Home Adventure

If the scattered content of this site wasn’t evidence enough, I have a slew of often unrelated hobbies. My latest venture is in the realm of smart home automation. It appeals to me for a variety of reasons: it’s tech related, it has tons of DIY appeal, there’s tons of fun communities and forums and platforms to work with…it’s dang cool when things work.

It started with an Amazon Echo a few years back. I was one of the first to sign up for the pre-order and get the gen 1 device. Next I picked up some WeMo smart outlets on sale and had some fun controlling various things with the Echo. However, only in the last 6 months or so have things escalated into a more comprehensive state.

I’ve never really verbalized my smart home goals, but if I had to create some simple one-liners:

  • Have control over the lights I spend most of my time using at home.
  • Replace all remotes I use.
  • Basic home monitoring (thermostat, etc)
  • Be able to control all of the above with voice or smart phone.
  • Do it on the cheap, not shying away from tinkering if need be.

I’ve noted around 80 smart home platforms, hubs, services, apps, etc in a spreadsheet. Looked into 50 or 60 of them to find ones that would work for me. Here’s a rough outline of what I’ve landed on, in no particular order:

  • Amazon Echo
  • SmartThings (using hub v2)
  • Broadlink IR/RF hubs (using RMPro and RM Mini 3)
  • Stringify
  • HomeBridge (a Raspberry Pi based HomeKit API bridge)
  • webCoRE (a SmartThings extension platform)
  • Other SmartThings extensions/SmartApps from the community
  • Wink Relay, modified
    • HousePanel dashboard
  • Inovelli smart switches w/ scene control
  • Philips Hue bridge + bulbs (v2 bridge, Bloom and standard white bulbs)
  • IFTTT
  • ecobee 3 + room sensors
  • Amazon Dash buttons (hacked, todo)
  • Other RF blasters (300MHz, 308MHz, 390MHz…todo)

I didn’t succeed as well as I would have liked on my final goal (low cost). Ultimately this wasn’t as inexpensive as I would have liked. However, I did shop very carefully. Most items I purchased at around half or less their usual cost. Others were strategic purchases, such as the Inovelli switches. First, they’re less expensive than most popular brands. On top of that, they’re more functional (scene control is amazing), and the team at Inovelli is incredibly helpful.

There were options that appealed to me more in certain ways (Indigo, openHAB, Home Assistant), however, whether in time or money, they ended up too expensive for my taste. SmartThings ended up being a good balance as a central hub. It was inexpensive on sale, and strikes a balance between established functionality for ease and expandability for control. In addition, it was very easy to give both Alexa (native) and Siri (via HomeBridge) control of all devices.

This post isn’t meant to be more than an introduction to my approach, but I figured I’d start myself back into updating this site. I’m hoping to document some of my methods…they were frustrating enough that I don’t want to repeat the troubleshooting phase, and hope it may be of help to others.

5 Comments

Filed under Smart Home

Meeting the Designer and Review of the Kendal and Hyde Classic Leather Satchel (2015)

Update (November 2018): Unfortunately, Kendal & Hyde is no more. Fortunately, a company called Salt Co. hired Kendal as a designer, and his work is still available from them. Check out my review of their thin briefcase at BestLeather. Spoiler alert: it’s amazing. Since a virtually identical bag to the one I reviewed here is available from Salt Co., I’ve updated several links/references throughout the article, apologies for any I missed.

I recently saw an advertisement for the Kendal & Hyde Classic Satchel, and the photo quickly caught my attention. I’ve actually always thought of getting myself a quality leather messenger bag or satchel. There’s something that’s simultaneously timeless yet unstoppably cool about the style that draws me in. Sure, I’ve tried some less-satisfying cheaper bags…but when I saw some of the pictures of the K&H Satchel, it was as though it was exactly what I’d visualized myself getting someday. I visited the site, and found out that this isn’t just a simple leather bag, either–it includes some modern touches as well. The laptop protection is excellent, and a handful of accessories are available to personalize your bag. I was impressed, and decided to look further into it.

It was hard not to notice the price right away. For a guy who considers paying $100 for a backpack splurging, seeing that the retail cost of the K&H would be $500 was a bit of a shock. There was some consolation in seeing that they were still at a preorder price of $400, but regardless, that’s pretty rich for my blood! I’m not one to write something off based on price alone, though–I believe in getting what you pay for. The bag matched what I’d been looking for too well to dismiss, so I started digging.

The details on K&H’s website were a great start. They give lots of information about the details of the bag, the materials they use, and their mindset in making design decisions. Their guarantee builds a lot of confidence: where most companies are only willing to help in the case of “manufacturer defects,” K&H will have your back, for your lifetime, even if the bag breaks from normal wear and tear. I discovered the comments on the Kickstarter to be very informative–Kendal, who designs the bags, answers nearly every backer comment, sometimes in great detail. Responses include useful information about leather treatment, design details (even some additional pictures), a list of revisions from their previous satchel design, even a breakdown of the differences between their bag and the relatively famous Saddleback products. The transparency and dedication to backers surprised and impressed me.

While all of this gave me a good grasp of what K&H provided and thought of their own product, I did want some third-party perspective, as well. I actually started with a more general search–what sort of things should I look for in a leather bag, indications that would justify the high cost? It turns out this was a wise move that furthered my draw to K&H and their Classic Satchel. It seemed that every time I found a new piece of advice about buying leather, I would compare that information with the descriptions I found from K&H, and sure enough, they met the highest of expectations. Thick, full-grain vegetable tanned leather sourced from North America; solid brass hardware; plenty of gunmetal rivets to strengthen weak points; no liner or excessive stitching to hide thin or incomplete pieces of leather; strong polyester thread where stitching is necessary; etc. Things seemed to be lining up nicely.

I also hoped to find some third-party reviews specifically about Kendal & Hyde’s products. Truth be told, there isn’t nearly as much available as I would like–we’re talking about a fairly new company (around a year old) that is just starting to establish their footing via Kickstarter. I found what I could though, and can essentially sum it up in a sentence: a video review here, a reddit post there, Best Leather gives their first impressions here, and a handful of happy backers give their thumbs up in some comments there. Though to be honest, all but the Best Leather review are actually about the older version of the satchel (the new one hasn’t been released)! This gave me some extra insight about the products and further boosted my confidence in K&H, but it still wasn’t quite enough.

Fortunately, I found out that part of their company base was a short drive from where I live. I decided to see if I could go and check out the satchel…a few emails later, I had a meeting set up with Kendal himself!

When I arrived at the meet, a pile of leather bags quickly grew in front of me: some of their other bags (including the old version of the satchel), their modular bag accessories, other bags they used as design inspiration, future products in the works…and, of course, prototypes for the new Classic Satchel. After doing an embarrassing amount of research on the web about this thing, I finally was able to get my hands on one–not to mention numerous other products, with their very designer available to ask any questions I had!

It’s all-too-often that when I finally get to experience a product in person, I’m a bit disappointed. It doesn’t quite have that special something I fantasized about when I saw the picture. That was the case with cheaper satchels I’ve tried out. This was not the case with the Kendal & Hyde Classic Satchel. The appearance in person was exactly the meeting of classy and cool that I enjoyed in the pictures, but with an added feeling of ruggedness that came from seeing how thick the leather is, how sturdy the hardware appears, and the overall heft of the bag. I started opening the bag to try it out with some of my things that I’d brought for that purpose. Based on some information online, I thought the leather may be very stiff and hard to use, but that also isn’t the case. On cheaper bags I’ve had, the poor leather, poor and excessive stitching, and lining are to blame for making the bag stiff. The quality materials on the K&H bag function very smoothly, while still giving a sense of strength. The buckles are amazingly easy to operate and the whole bag moves just as it needs to, without the undue crinkling or folding common to lesser bags. The very thick leather does have some stiffness, but this mostly just aids in maintaining the bag’s shape, preventing floppiness, rather than making it more difficult to use. These prototypes I tested out are also very new–with time, the leather will wear in, molding to one’s own use.

The straps are awesome. I was wondering about length, since some satchels I’ve tried don’t have nearly enough holes punched in them to help you get that perfect length, but the K&H has plenty. The buckle is as nice as the ones on the bag, and the shoulder pad is very thick. Typically a small bit of neoprene is used for padding on the shoulder, but Kendal didn’t like the way neoprene makes the leather over it fold and crease, so he tried out a another small piece of softer leather instead. This results in a pad that is harder than you’re used to, but will maintain the shape it becomes when resting on your shoulder, won’t create any uncomfortable creases over time, and has a large area of contact that distributes weight. I thought that was pretty clever. The straps are connected to the bag with more of their solid brass hardware, and can roll and twist very easily so that the bag rests comfortably.

Sizing was another factor I was hoping to get a feel for during the visit. Reading the descriptions and advice on their website gives the impression that these bags, size for size, are larger than most bags. I think this is because of the way they’ve been designed around the laptop compartment. Most similar bags are just larger than the laptop they’re meant to hold, but the K&H Satchel’s laptop compartment is a bit different. You can see an animation of how it fits within the bag on the Kickstarter page, but it’s essentially utilizing the seam between gussets as a wide protective barrier for the edges of your laptop. As a result, the bag’s overall size is more like the size you’d expect for a bag meant to hold a laptop about 2″ larger in screen size. In fact, larger laptops do fit quite nicely into the main compartment, if you want a smaller bag but have a larger laptop (15″ laptops will fit in the main compartment of the medium satchel, etc.).

Based on this information, and also probably biased by an excessively large satchel I’d recently tried out, I expected a lot of space. What I hadn’t realized, is that the K&H Satchel is fairly compartmentalized. Most satchels are just one large bucket of space, and everything is just sort of thrown into the same main compartment. You’d be lucky to have a front pocket or magazine pocket on the back, and a flat pocket or two on the inside panels. The K&H satchel is divided in the center of the main compartment by the laptop pocket, with the front compartment further broken up with some pockets, and the back compartment the only larger bucket of space. What this meant was, I needed to sort of organize all my things into place within the different pockets. Instead of worrying about my Nalgene crushing my wireless mouse or headphones, it fit snuggly into the back compartment next to the headphones, and didn’t just roll about in my bag. The mouse could be placed in a separate pocket. The take-home message is that the compartments aren’t as wide as similarly sized bags that aren’t divided up, so some wider items will be more snug or may not fit at all (the thermos tube accessory may come in handy for this). Overall, I’d suggest following the advice offered on their webpage: pick the size that fits your laptop. Not only will your laptop get some stellar protection, but the overall effective space isn’t vastly different between sizes. If you have some flexibility as far as laptop is concerned (or don’t mind your larger laptop being in the main compartment of a smaller bag), do consider that the large is pushing the size of a carry on, and the small felt small enough to be a purse, to me. Check out their pictures of 5’9″ Hyde carrying each size for reference (link is now dead, see update at top of page). While the bit of extra space from the large is appealing (and would be nice for travel purposes), I felt the medium will suit most of my uses, and my 5’10” 165lb frame, the best.

I didn’t experiment too much with the accessories, but did gather a few notes. The thermos tube was a bit larger than I imagined, even though they have several pictures of it online. The external pockets are pretty sweet looking, and the simple closing mechanism seems very secure. One thing to note about the accessories is that they do have substantial weight, and will only become more heavy when filled…this does make the top flap of the bag less wieldy when the accessories are attached. I imagine most using the thermos tube will attach it to the bottom partially for this reason, though this will make the bag harder to set down. Overall I liked the accessories, and they’d make great add-ons to add some space and organization. I think the backpack straps will be a necessity for myself. I also saw a prototype for a water bottle holder and spoke with Kendal about a few things in the works–he has some cool ideas. I was especially intrigued by accessories that would be able to quick-clip to the same portion of the bag that the shoulder strap attaches to.

I also spoke with Kendal quite a bit about the company. It was fascinating to hear stories about the design process, securing their leather, dealing with hiccups. They design products with the looks and strength of designs that have stood the test of time, but incorporate modern features to address modern needs and add modern convenience. It felt like Kendal had very little tolerance for sub-par product. He has tried and sifted out many suppliers and manufacturers that didn’t meet the standard. The company’s first batch of leather belts didn’t meet this standard, and rather than ship the less-than-perfect product to consumers, they fronted the bill, donated the belts, and started over–a move that nearly put them out of business. I was impressed by their dedication to quality, in addition to taking advantage of opportunities to be charitable. They also donate quality sandals to those in need for every one of their boots purchased. Kendal loves his products, puts his best work into them, and makes himself very available to customers. This is the sort of company I’m happy to support.

Within the next couple weeks, I’ll have a working satchel prototype, and will be able to provide a more detailed review after giving it some use. In the mean time, check out Kendal and Hyde (Kendal designs for Salt Co. as of 2018! See update at top of page) for yourself, and feel free to ask me any questions in the comments.

Update (9.11.15)! I picked up my prototype yesterday evening! Photos and more hands-on review information to come soon.

9.11.15

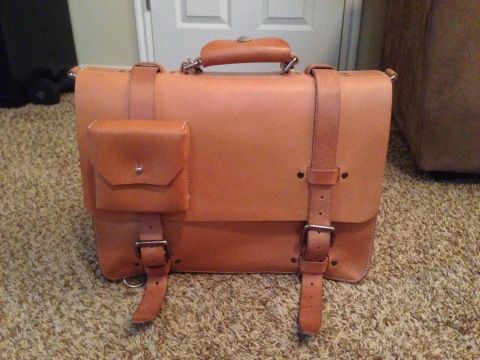
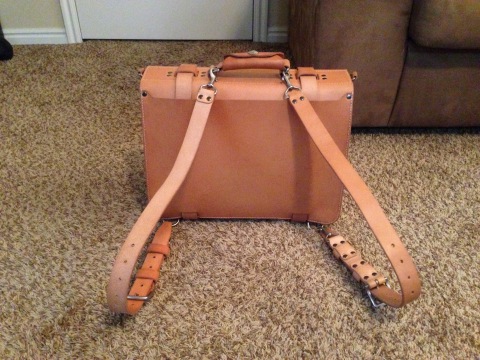
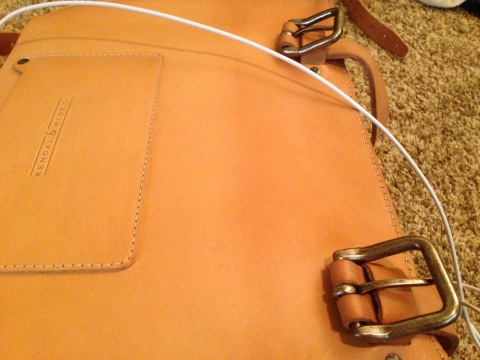
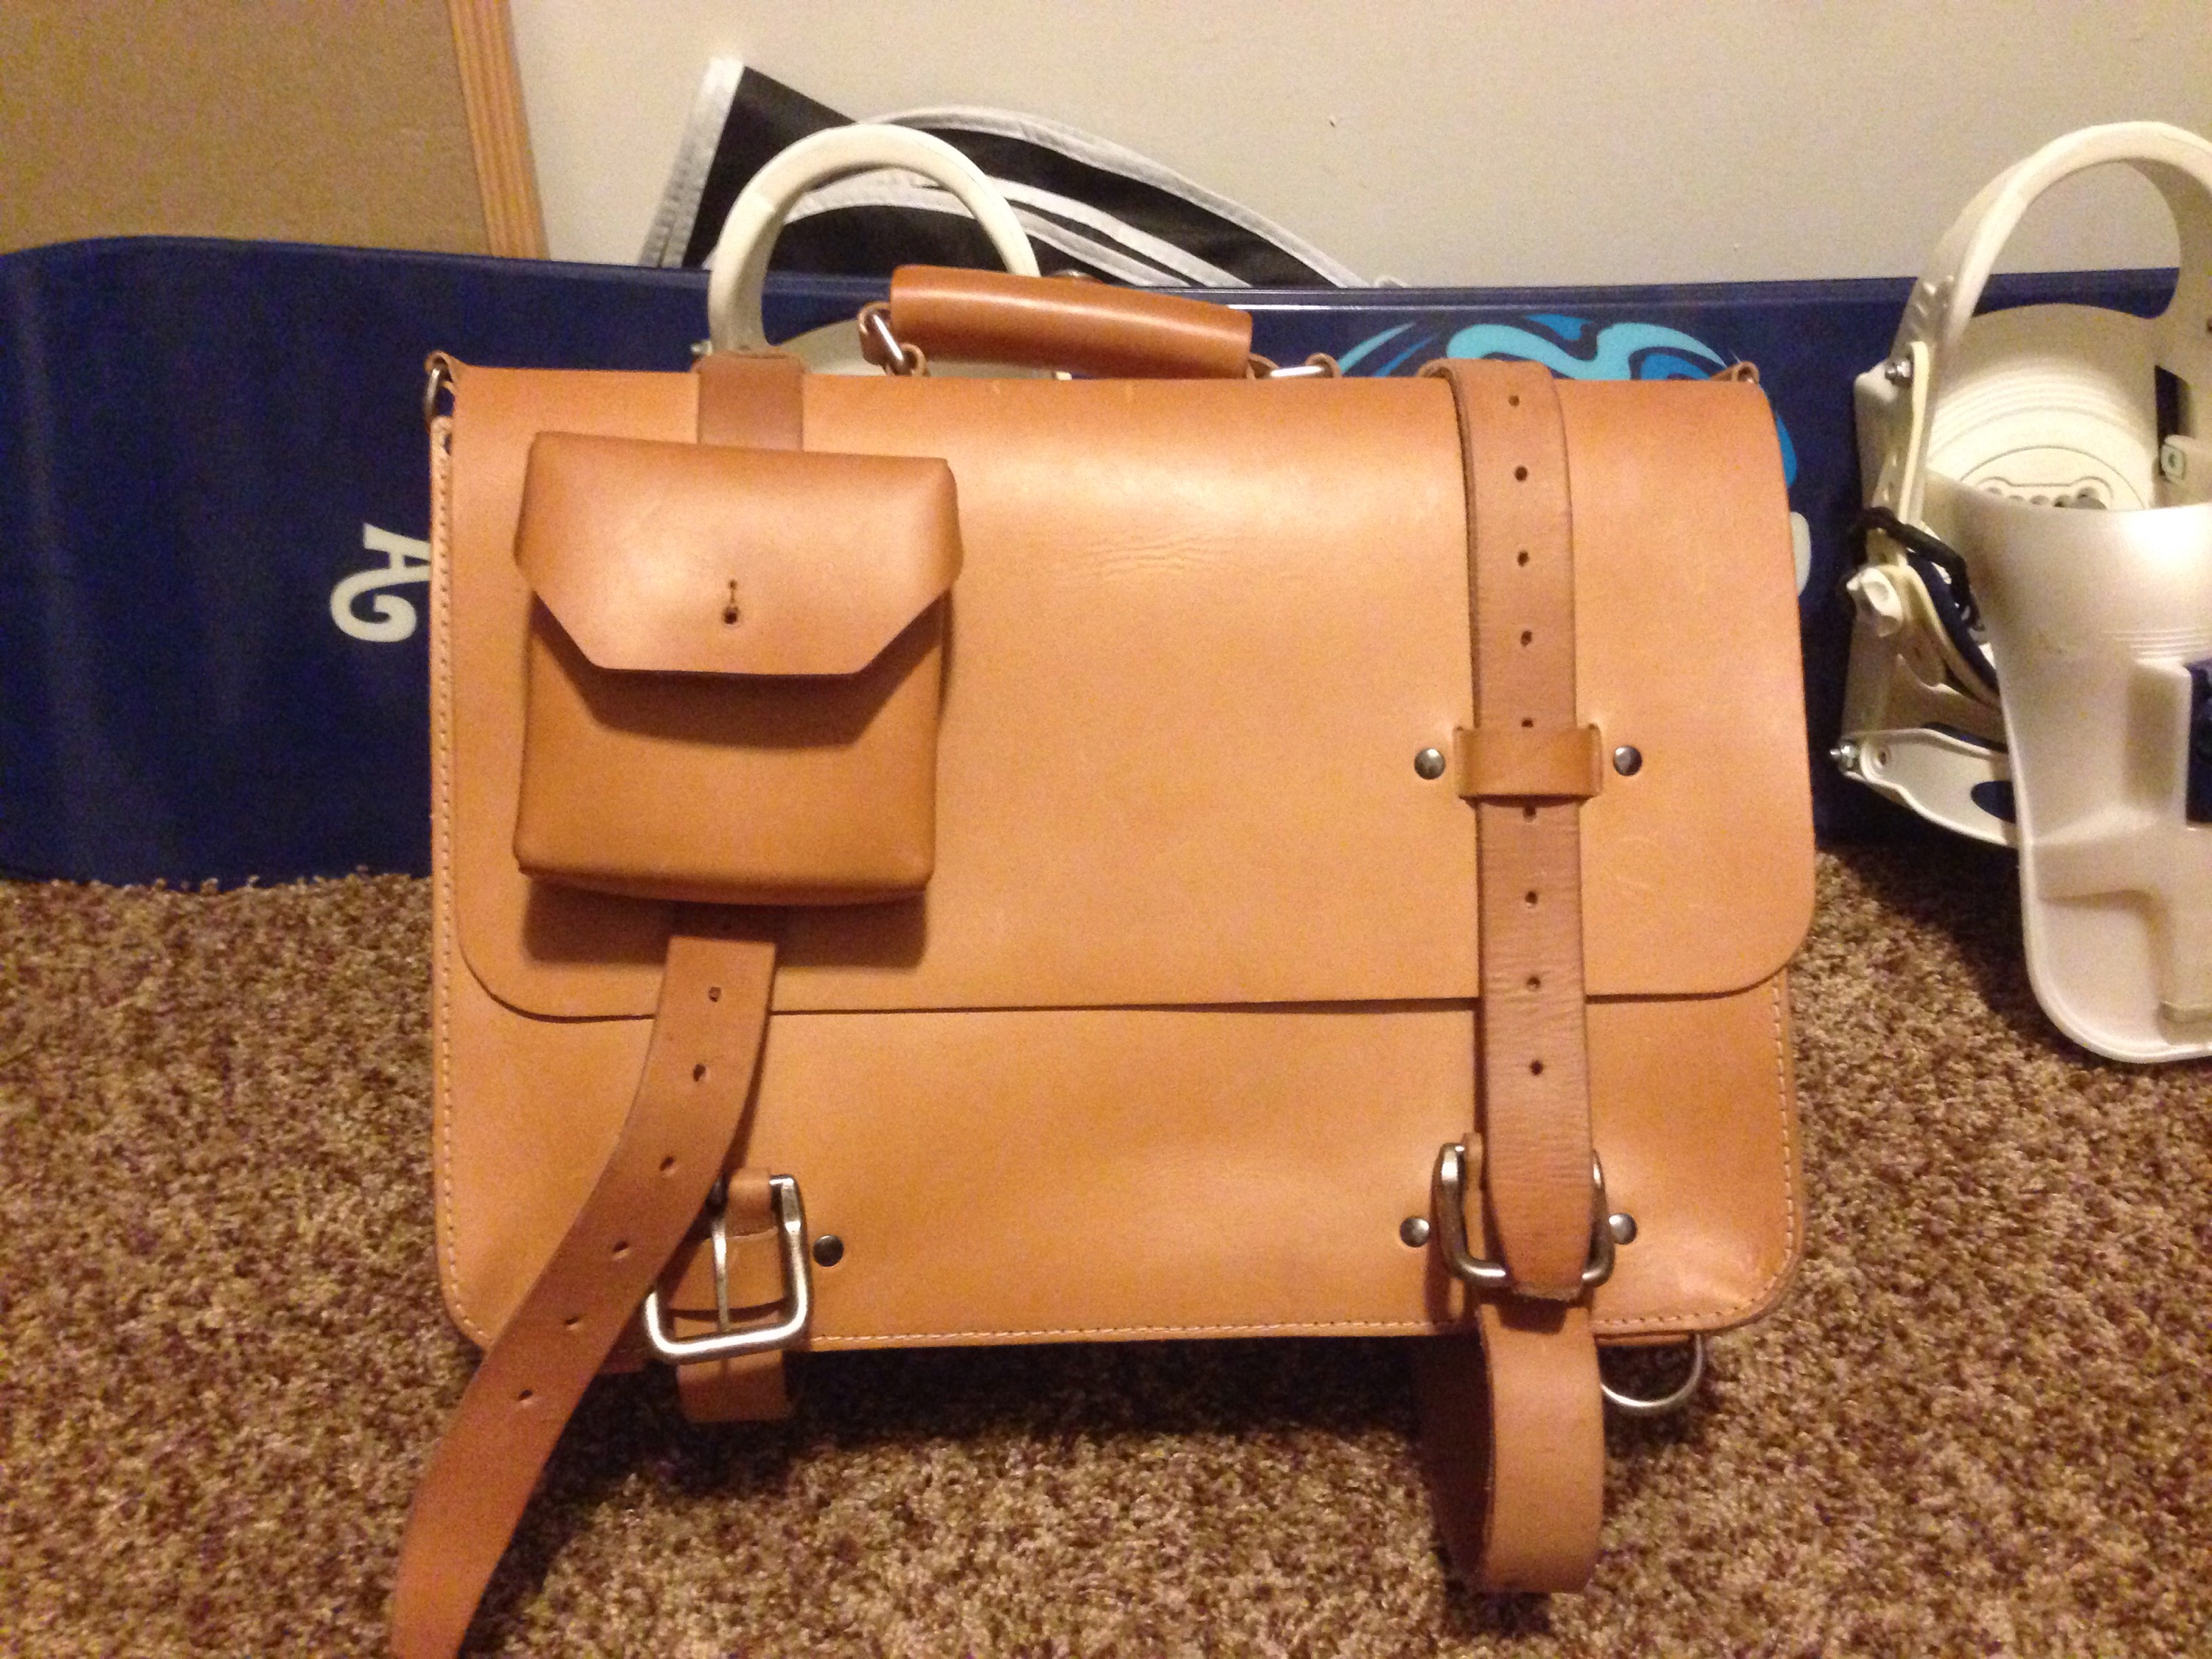
I haven’t had much time for trying the satchel out, but thought I’d throw up some quick pictures. Sorry if they’re not especially good pictures, but I wanted to capture a few things I noticed. Disclaimer: my satchel is a prototypeand while it will be very similar to production models, a few things are different. I’ll note differences I’m aware of, so make sure to read the descriptions. I will say upfront that all the hardware, save for the clips on the backpack straps, is not the same as will be on production models. Please let me know of any other pictures you’d like to see. This is a medium satchel in the ‘natural‘ color (but it has been extensively treated, so the natural has darkened a fair amount). Click photos to enlarge.

Front of the bag with single pocket attached.

Front of the bag with single pocket attached.

Back of the bag with backpack straps attached. Note that they don't have shoulder pads--this will be the case with production versions of the backpack, despite being shown with them on the K&H website.

Back of the bag with backpack straps attached. I’m told the production version will come with the pads shown in the picture on the K&H website.

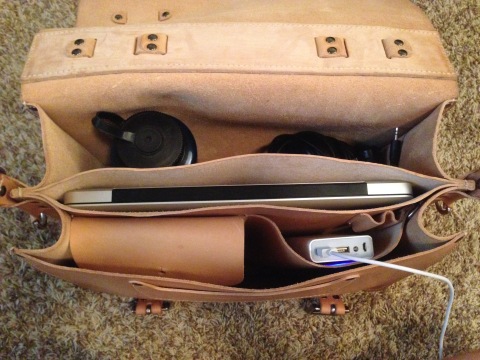
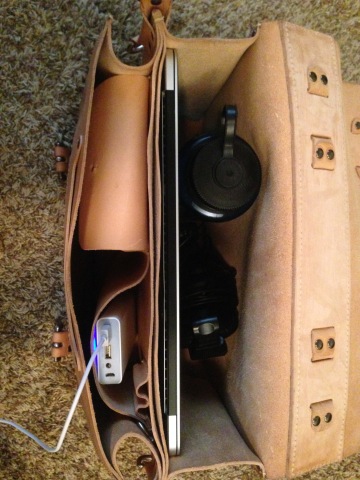
Inside with 13

Inside with 13″ Macbook Pro in laptop sleeve, battery pack in front compartment pocket, and Nalgene and headphones in back pocket. Snug fit for the Nalgene and headphones.

Now with a 15

Now with a 15″ Macbook Pro in the back compartment, since it won’t fit in the laptop sleeve. Tighter fit yet for the Nalgene and headphones, and could scratch up a computer without the skin I have on mine.

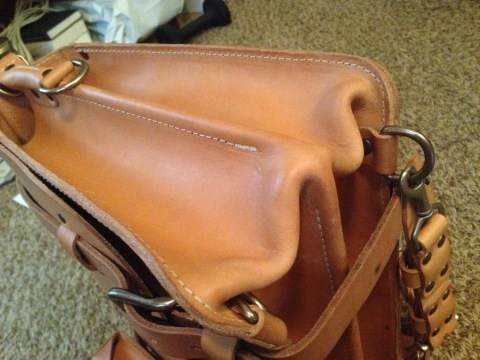
Detail on outer gusset. Note that the side consists of one piece of leather covering both gussets...this is a somewhat recently added feature that will be on the production models. I think it looks better than cut pieces, which is what the outer seams on the bag are.

Detail on outer gusset. Note that the side consists of one piece of leather covering both gussets, rolling over the center…this is a somewhat recently added feature that will be on the production models. I think it looks better than cut pieces, which is what the outer seams on the bag are (also visible in this picture).

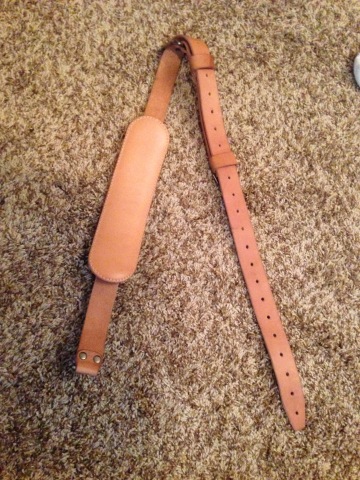
Should strap. I love that there are lots of holes to adjust the length. Shoulder pad is firm with leather insert as padding, but the idea works well.

Shoulder strap. I love that there are lots of holes to adjust the length. Shoulder pad is firm with leather insert as padding, but the idea works well.

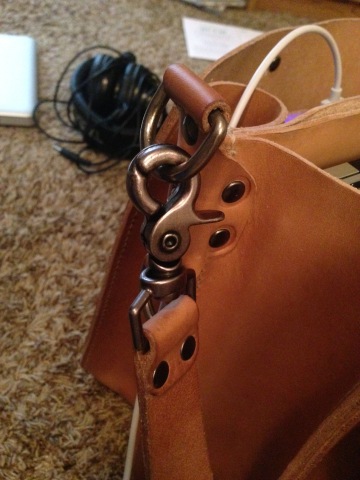
Detail on shoulder strap clip. This is prototype hardware, and production models will have the type of clip that slides open on one side only, rather than the lobster claw style shown here.

Detail on shoulder strap clip. This is prototype hardware, and production models will have the type of clip that slides open on one side only, rather than the lobster claw style shown here. See picture of backpack strap clip.

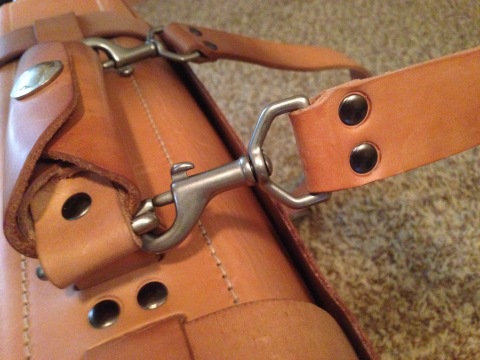
Backpack strap clip detail. Unlike the clip that came on my shoulder strap, this clip does match the hardware the production models will use.

Backpack strap clip detail. Unlike the clip that came on my shoulder strap, this clip does match the hardware the production models will use.

Already has some tan lines :) I'm told these will smooth out over time, but I think it's fairly cool.

Already has some tan lines 🙂 I’m told these will smooth out over time, but I think it’s fairly cool.


Had to share this. 9/16: Before.


9/24: After! No additional treatment–just normal use. Including some short motorcycle rides 😉

10.21.15 Update

I’ve now had my K&H Classic Satchel for just over a month, and think it’s time to give my more experienced thoughts on it. It’s probably worth noting that this is essentially my first leather product, so some things I’ve observed are likely true of all similar leather bags.

Long story short: I love the bag more than ever. Here’s some of my more specific thoughts, too:

  • The leather is tough. It softens up with treatment and likely with time, but it’s just a strong material. This means the bag is sturdy enough to offer some serious protection for your items, especially the internal laptop pocket. I can even pretty comfortably use the bag as an armrest on the bus 🙂 the strength of the leather also means it isn’t ideal to hold some soft items. As the stiff leather folds over, it is capable of squashing items not able to hold their own shape.
  • On that note, my original concern about the K&H satchel not being ideal to hold items that are around that 3″ width mark is still valid. I sometimes get nervous about  the stiff leather pushing down on my headphones, for example, especially when I wear the bag and my body pushes against the back opening. Ideally you’d have the back opening filled with books or other flat things, and use the more organized front opening for smaller things placed in the pockets. The area around the front pockets isn’t too easy to use, but I often slip some papers in front of them, or place my battery pack between them.
  • Transitioning from a conventional backpack takes a bit of practice. I love the true buckle closures, but they slowed me down at first. However, they are more quiet than zippers and allow simpler one-handed use, especially for opening. If you allow the heavy buckles or other hardware to hit hard surfaces they can be quite loud 🙂
  • I thought I’d love the backpack straps and wasn’t sure how much use I’d get out of the single pocket, but my opinion has flipped. Except for times that I really need to walk around with the satchel a lot or on longer motorcycle rides, the shoulder strap is faster and more convenient than the backpack straps (especially since I can lift the satchel while open with the shoulder strap…the backpack straps attach to the handle, which is, unfortunately, unusable unless the closure straps are buckled…or you want to spill your stuff everywhere). The single pocket, however, is enormously useful for stowing that one last item that you need quick access to. My roommates jokingly call it a “sandwich pocket,” since it does fit a small sandwich well. I’ve even used it as a phone holster on the shoulder strap, in a pinch.
  • Everyday, I love my satchel more and more. Everyday, my satchel becomes more my own, with deepening tan lines and scuff marks giving it character and identifying it as uniquely mine. Kendal loves this aspect of his bags, he designs them for it, and I couldn’t agree with him more. It is just plain cool. As this is easily the most complimented and admired thing I’ve ever owned, I’d say I’m not alone in this opinion.


11.4.15: Another light treatment and month of use. Developing a bit more brown in the patina and some unique marks.


1.6.15

3.7.16 Update

In part due to my review here, I’m pleased to announce that I’ve recently been brought onto the review team over at BestLeather! This review on my own website is more detailed and is more likely to be updated and responsive to picture requests, etc., but I did write a review (with even more pictures) on this satchel on BestLeather’s website here.

29 Comments

Filed under Review

The Skatecycle

I saw a deal lately on the skatecycle, a strange love-child of a skateboard and casterboard, a clear descendant of the snake board, and, in my opinion, a reasonably good longboarding substitute. I haven’t tried something new in a while, and figured I’d give it a shot. Reviews all indicate–and I entirely agree–a very high learning curve for this sucker. This is coming from a guy who has held a few season passes for snowboarding, regularly longboards, has held his own wakeboarding, wake surfing, skiing, even flyboarding, and has dabbled in surfing, waterskiing, and skateboarding. Having a board attached to my feet that’s meant to get me around isn’t an unfamiliar feeling, but the skatecycle is an entirely different experience.

I think my extensive board-sport experience has helped me avoid any serious discomfort; I think I’ve only ended up falling off my feet once, and that was fairly gently onto my hands. I’m also guessing the soreness in my feet would be drastically worse if I wasn’t as frequent a snowboarder as I am, though it still gets fairly painful. This is only speaking from a week’s worth of experience, though!

There’s a decent handful of advice on how to get yourself going on the thing, but I think it ultimately comes down to trying out a lot of ideas. I’ve mixed tips from how-tos all across the web, sticking with things I like more. The concept is fairly simple. Your feet are individually planted in the centers of two large wheels, connected in a very flexible way (not only does each hub rotate 180 degrees from the center axle, but the axle itself is made of a flexible material). You can lean and turn your feet to steer, and, ideally, develop a quick snaking motion that will allow you to propel yourself (I wouldn’t know…this part is clearly the hardest, and I’m still far from getting the hang of it). So far, after 3-4 hours or so of total practice, I have a fairly good handle on controlling the board on a gentle decline. My stops tend to be messy. There’s no clean-cut way to stop, actually…similar to a longboard or skateboard, you’ll need to either powerslide or otherwise be creative. My favorite longboard stop–stepping forward off the board to transfer the motion to my legs and stopping the longboard–isn’t so feasible, with your feet within the wheels as they are. Powersliding is far down the road in my skill set. I currently rely on trying to turn away from or against the decline I’m on, to slow myself to a stop or close enough to just sort of step off. Some reviewers suggest a quick turn to stop, sort of what I’d do on ice skates or rollerblades, basically creating a circle with the wheels. I’m about halfway there with my turn method. Bottom line: it’s tricky. I’ll update when I’ve got a better handle on the self-propulsion thing.

Update (8.31.15): I actually managed to sprain my ankle really good about two months ago, and haven’t been on the Skatecyle since! However, I had made some progress before that time. I can self-propel myself just a bit now. If there’s almost any uphill slope at all, even just barely, I almost inevitably am too slow to keep my balance. The key to developing the ability to self-propel, for me, was realizing, through repetition and practice and trying again and again, how the physics of the self-propulsion works. Essentially, you’re creating your own fall line, then nudging yourself to take it (the “fall line” is, i think, a snowboarding term, but it’s basically the point where you have shifted your stance enough that gravity is able to start moving you). When you turn your front ankle one way, you naturally sort of angle it downward…this creates the sort of “fall line.” When you twist your back ankle the other way (again, naturally creating a slight downward angle), you position your leg in a way that allows you to sort of “push” the skate cycle slightly, nudging it to follow the fall line created with your front ankle. Of course, you only follow that fall line very briefly, creating a bit of momentum, then you quickly switch both ankle turns…canceling the slight turn your first ankle movements caused, and creating forward momentum again. I’m sure this is far more complicated than any of you actually reading this care to think of it, but it helped me.

So far, the only tips I have that seem to have really helped, are to make sure your feet are angled outward to some degree, and build up your confidence on a very gently slope to get started. I did some flat-land practice with a wall for balance, and I’m not sure it did much more than to give me a bit of an idea of how the board reacts to your foot movements. A gentle slope will give you just enough movement to help you balance and feel the way the board moves, but not so quickly that you’re in a lot of danger, since you’re still learning control. The slope will keep you up and moving while you develop the muscle memory to turn and eventually propel yourself (you’ll feel yourself start to move faster than the decline alone would cause).

I’d also like to comment a bit on the build. A lot of reviews left the impression that I’d be really impressed, that the skatecycle is built like a tank. I certainly wouldn’t use such glowing words; it is, ultimately, primarily made of plastic. The central hubs of the wheels (including the footboards) and pivoting connections to the center axle are metal, and I’m not actually aware of what material the axle is made of (it’s actually covered by a rather squishy material, I presume for carrying purposes–since both hubs can rotate all the way sideways, the skatecycle can sort of fold into a nice compact shape and the axle turns into a sort of briefcase-like handle right in the center). However, all the outer siding is plastic, and since I’m rather adept at letting the skatecycle take the beating instead of my body when I need to bail, it’s already pretty beat up. The plastic on the outside of the pivoting axle connections, in particular, looks like I’ve taken a grinder to it. The bearings seem to be pretty dry out-of-the-box, as well…it certainly rides quite loudly. I intend to email ANVL Boards, the makers of the skatecycle, to see if they actually intend to have the user apply some grease from day one.

Update (8.31.15): I pulled apart the Skatecycle (not all that easy, but you get the hang of it after the first wheel) and applied white lithium grease to the bearings. I gathered that white lithium grease, while an awesome lubricant/grease, is just a bit too thick for skateboards, so I thought it would be perfect for the large Skatecycle wheels. While it did dramatically decrease the noise, it also slowed me down a bit. I think white lithium grease is too thick for a Skatecycle as well, and suggest something thinner like 3-in-1, Tri-flow, or even spring for Bones skateboard lube.

It’s worth noting that an imprint on the bottom somewhere reads, “Designed in Brooklyn, Made in China.” Classic. The material and advertisements for the skatecycle definitely left me the impression that they were an all-American company from start to finish. However, so far the device ultimately has held up well; I don’t get the impression the footboards will break off or something more drastic like that will happen. ANVL Boards also offers a 2-year warranty for manufacturing defects, but it’s definitely not a no-questions-asked type of thing; there’s a nice laundry list of exceptions to void the warranty right on the box (wear and tear, etc.).

I’d say it’s been worth it so far. I’m in the midst of finals and haven’t gotten to a really comfortable level yet, but the few times I’ve really gotten a nice long run down my road and felt the ability to carve out turns, it’s felt great. My impression is that it will only become more fun as it becomes second nature to ride. I think it will mostly become a substitute longboard for me. I’m not a skatepark junkie or longboard commuter (both of which would be valid uses for the skatecycle, as well, for the record), but I love to find nice long winding canyon paths to cruise down, and the skatecycle seems perfect for that.

Update (8.31.15): I’ve tried my Skatecycle on my usual long boarding trail. It may have been the slow-down caused by the white lithium grease (see above update), but it was tough, and fairly slow. My friend’s longboard drastically out-sped me on the Skatecycle, whether we were on a downhill or flat land and self-propelling. Perhaps this is from lack of experience on my part, and I will get better and potentially to that speed…perhaps it’s due to the overly-thick grease I used…or perhaps a Skatecycle just isn’t as efficient for getting around 🙂 I’m not sure. I’d like to get back to practicing soon (ankle injuries take way too long too fully heal, and the Skatecycle is very rough on your ankles), and see if I can’t get a higher level of efficiency and speed.

2 Comments

Filed under Review

Trip Report: Cascade 2014

Realizing we hadn’t planned something for our usual Tuesday hike and that doing Cascade would check off the last of Utah Valley’s 7 Peaks for me, my roommates and I more or less spontaneously decided to bag it.

Little did we know what we were in for.

I’m not sure if it was on the way up as we were bushwhacking our way over the umpteenth craggy, dense ridge hill (each one more mocking than the last, seemingly never turning into the true summit) or on the way down when all of us were out of water and ignoring how disgusting the snow we were melting to drink was, but at some point I decided those who say Lone Peak is the most challenging non-technical hike in Utah are full of it. Or, perhaps, like the vast majority of them, they haven’t done Cascade…or, if they have, they’ve decided it was worthy of being classified as technical.

At any rate, make no mistake: this is an extremely trying hike. You may notice, like I did, that experienced hikers posting trail reports mysteriously report a round trip time of 11 or 12 hours, despite similar length and elevation-gain hikes taking them 5 or 6. I say mysterious because, in my opinion, almost none of the trail reports out there properly warn you for what you’re about to face. For this reason, I think many take it for granted…myself included.

Don’t get me wrong, we did our best to prepare for what we knew would be a challenge, even with several peaks already under our belt this summer. Mentally we were ready for a trial (set what we thought was a realistic goal of 10 hours); our bags were full of food and at least 3L of water; we started as early as we could (7:30AM on the trail). However, it wasn’t meet for what Cascade throws at you.

There are a few different routes to get to the top; the most reliable one seemed to me to be the Dry Fork route, which is 9.5 miles up Squaw Peak road once you turn onto it from Provo Canyon (The second most promising, in my opinion, was the trail starting up past Vivian Park in the same canyon). Here’s a Google Maps pin: https://www.google.com/maps/dir//40.2689904,-111.5791157/@40.2703569,-111.6106604,6299m/data=!3m1!1e3!4m3!4m2!1m0!1m0

The first half of the trail is a decently steady slope, leading towards the ridge between Cascade and Freedom. You’ll start to get into some meadows, where many people see the gullys that head straight toward the ridge and diverge (we decided in advance that we wouldn’t diverge from the trail, having read so many stories of failed shortcut attempts). Past the meadows you’ll head towards the right (south), veering towards Freedom Peak, and Provo Peak just southwest of that. As you get directly below Freedom, you’ll switchback left, and start going up towards the ridge. As you get to the top, you’ll see a fork–stay left on trail 059 (the Dry Fork trail begins off Squaw Peak road as trail 060, for the record).

You have maybe 1/3 of a mile of trail left, mostly downhill. You’ll reach a small area where people appear to have camped, and see a strange, large (maybe 6′ by 10′) plastic basin-like thing (we wondered if maybe it was for catching rain water so people could filter it for the hike?). This is where the real fun begins.

Don’t underestimate what you’re about to attempt. Cascade doesn’t quit, and doesn’t give any mercy. I also suggest not trying to be clever about this. You’ll go up and down (my guess is the ~3,700ft you gain in this hike is probably closer to around 5,000 with the ups and downs of this ridge) over ridge peaks for around 3 miles, with tons of trees and loose ground that love to make things difficult for you. There is no trail. Yes, there are rough outlines of trails around, but many of them will lead you where you don’t want to go, so unless they are remarkably obvious and clearly lead where you want to go, be careful.

I think the best rule of thumb is to stick to the ridgeline as closely as possible. There are trails that look like they avoid unnecessary elevation gain on a ridge hill; they often just skirt halfway around it then force you to go straight up to the top over loose dirt and shale. I won’t pretend to know the best way to take this portion of the hike, but very, very rarely did I regret not just sticking as close to the highest point along the ridge as I could. It’s often where the path is cleanest, and overall requires the least amount of effort. You will run into areas where the ridge is totally blocked by thick brush and trees, but typically you just skirt right below that brush and come right back up.

Particularly on the way back we thought we could be clever, since now we’re heading downhill anyway, right? Wrong. Stay close to the ridge. It’s your best bet. Should you choose to take a gully shortcut, please carefully know your path via maps beforehand and be careful.

The first summit that completely convinces you you’ve reached the top is often the false south summit. There is a cairn and a registry in a small jar hidden nearby. However, the highest summit of cascade is still two ridge hills away (note again: two ridge hills. It was very disappointing to reach the first and realize it, once again, wasn’t the summit). The path between the south and north summits is likely the simplest path of the ridge. There is a cairn at the north summit as well.

Enjoy the summit. The views really are amazing, it’s a largely unobstructed 360 degree view. You can see all of Utah’s biggest peaks besides Lone.

Follow the same general guidelines on the way back. As I mentioned, we ran out of water, and this was a very mentally taxing return trip. One of our party started to feel some real pain as his shoes were wearing thin and his legs were getting charley horses. Once we were out off the ridge the sun was beating down on us, but we trudged through and actually did make our goal of 10 hours, arriving at the car just past 5:30PM.

Just doing the math with distance and elevation gain (about 6.5 miles one-way and gaining around 3,700ft), you have an average slope of 10.7%…however, this is entirely deceiving. If my guess of that reaching 5,000ft with the ridge hills is accurate, we actually have an average around 15.4%, and of course, it’s actually much steeper during the uphills, since some portions of the hike are downhill. In addition, there is more brush and pathfinding necessary to summit Cascade than any other hike I’ve done. I think I would qualify this as the most challenging peak I’ve done, even more than King’s or Whitney, especially from a mental perspective.

Please don’t underestimate this hike; but if you are feeling up to a real challenge, go get that view from the top. I will update this post with pictures and additional detail soon.

Leave a comment

Filed under Trip Reports

Trip Report: Lone Peak 2014

Lone Peak. Often considered the most difficult non-technical summit in Utah, and the northernmost of the 7 peaks of Utah County. I’ve had my eye on it since I first started hiking, as had my sister Mica, who originally hooked me to hiking when we did King’s Peak in 2012.

We decided to do the Schoolhouse Springs trail, which approaches Lone from the south end, instead of the more common Jacob’s Ladder trail from the north. We relied primarily on this post as our guide. I’ll try to enhance the information given there.

Here’s Google Maps pin of the trailhead. You continue past the pinned point up the dirt road until you get to the water tank, where there’s a gate titled “Lehi.” There’s some parking room on the left right as you see the tank.

The trail between the trailhead and the First Hamongog is, essentially, a dirt road. Wide and obvious. There’s even some signs discouraging trespassing at a couple places where you may be tempted to diverge. It’s a pretty steady two miles up switching back on this road, and there’s only one place to definitely be aware of:

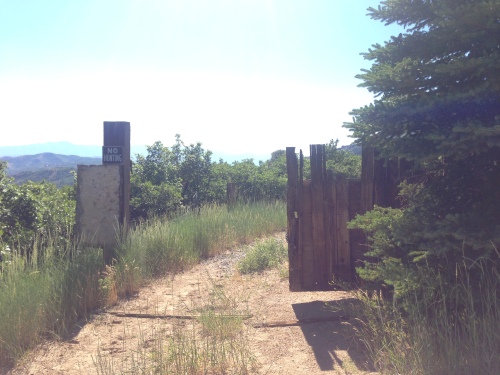
Gate to watch out for. Take the shortcut!

Gate to watch out for. Take the shortcut!

When you see this gate, turn right before going through the gate and go up the “shortcut” path there. Also, as you get back onto the road, take a look around for some kind of mark to help you get back on this shortcut on the way back. We happened to take the shortcut on the way up, and realized how useful it was on the way back when we missed it. You go up and down on the dirt road for a significantly longer stretch than the simple uphill shortcut here.

You’ll notice the Lone Peak Wilderness sign and, well, a large meadow (which is what hamongog means) when you arrive at the first hamongog. Continue on the trail and take the left on the fork within the hamongog. This first stretch took us around an hour; we weren’t going at a particularly fast pace, but we were consistent.

The stretch between the first and second hamongog is quite a bit less pleasant than the first stretch. The trail is now a thin single-lane trail, and isn’t terribly well cleared. Quite a few little white bugs got all up in our faces. It’s less steady, as well. The views get better and you start to see more of the summit area, mostly the west summit face.

It took us a bit more than an hour on this trail to get to the Second Hamongog. You’ll know you’re there as you start to see cleared areas below pines with huge rocks and campsite-like areas. Looks like an awesome lost boys type area, and right after it will be the huge field. This is where we camped for the night.

Panorama of our camping area, Second Hamangog.

Panorama of our camping area, Second Hamangog.

Now comes the fun part–reaching the summit. We went left at the fork in the Second Hamongog, though it seems there are many ways to approach the west summit face, and you could likely get there going right as well. The left fork pretty quickly leads to a drainage of sorts; at least when we went at the end of June, a decent amount of water was flowing, and it was beautiful. However, it was also beastly. Very strong slope the entire way, and while there is a trail of sorts on the left side of the drain, it’s mostly just a matter of heading up.

As you get closer to the base of the west summit face, you’ll want to start heading right. As you do you’ll see the trail ascend more gradually between the west summit face and what’s apparently referred to as “Question Mark Wall” towards the east. You’re just climbing at this point; more and more granite the further up you go. There’s not really any sort of defined trail, so it seems most people will end up at different points along the saddle. We kept going left and left, as we read that’s the direction you turn once you hit the saddle anyway, and ended up not having to travel along the saddle almost at all. There was some snow patches we had to work our way around this early in the season.

You’ll certainly know the saddle once you reach it. Very intense dropoff on the north/east side. Start heading left; it’s not an intense ridgeline the rest of the trip up. You’ll get to an area with much less granite, and a steady steep slope that leads to the south summit.

The view is incredible. You can see both Utah and Salt Lake valleys. It’s worth noting that from the Schoolhouse Springs trail, you’ll reach the south summit first…and the north summit is around 25ft higher. However, the ridge between them I have lovingly nicknamed “NOPE ridge.”

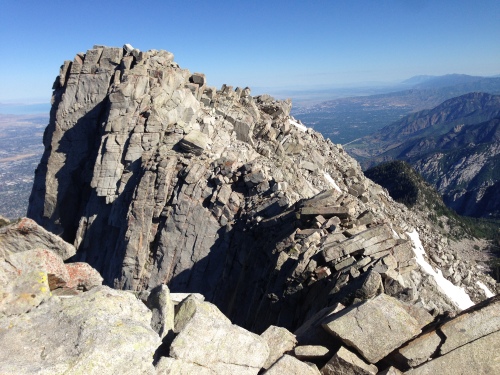
NOPE Ridge.

NOPE Ridge.

My sister and I both have far too much pride to not have attempted to make it across, but after a extremely scary experience where she almost passed out and ended up panicking to a degree, we turned around. Make no mistake: this ridge is no trivial jaunt. It’s a class 4 hike, especially if you follow the mountain goat trail that we attempted on the east side, below the ridge proper (apparently if you just cruise along the top, it’s easier, but there is a 90 degree drop-off on the west side…). A couple very experienced hikers cruised across it in no time right before us, but we found out later one of them has multiple broken/cracked vertebrae in his spine from falls (just a gauge of what type of person makes it across this ridge).

The trip from Second Hamongog to the summit took 3.5 hours…very much the most challenging portion, around double the steepness of the other two sections (a 32% slope). Overall, the hike via Schoolhouse Springs is 5 miles, gaining 5,500ft, giving an average slope of 21%. This is about the same slope as Olympus, and not quite the ~40% of Provo Peak, but drastically longer than either of those–and I agree with the claim that it’s the hardest non-technical hike in Utah. I’ve only done around a dozen, but that has included most of the biggest. We didn’t go the type of quick pace I’m used to, probably a more standard pace for non-consistent hikers, and total hike time was probably about 10-11 hours. The hikers that came right after us that cruised across the ridge claimed it took them less than 3 hours to the top; I’d guess around 3.5 both ways would be a more typical time for my usual pace.

Leave a comment

Filed under Trip Reports

OpenCV Error Messages Suck

OpenCV is a powerful image processing library that can make your project much more simple. However, when things go wrong with OpenCV, the errors that are returned are primarily useless without doing some serious digging into their code (which can be tricky in and of itself). I know every case is different, but here are some errors I’ve had, the largely cryptic messages, and how I fixed them.

Note that I’m using OpenCV 2.4.8 on a Macbook Pro with Xcode 5.0.2. I ought to write up some hints on how I got this to happen in the first place, as well…getting OpenCV working with Xcode isn’t really trivial. For now, here’s errors I faced and how I fixed them. My fixes may not be the same as yours, but hopefully they can give some direction if you’re getting the same error message.

I’d be happy to see some similar errors and fixes in the comments, I can always add them to the post itself over time. I intend to update with my own errors as I continue to encounter them. I’m certainly a far, far cry from an OpenCV expert, but if you have other questions please post them, myself or others may be able to help. Hopefully this post can be a good source for lots of fixes. My hope is that this post will appear when OpenCV coders search their error messages on Google, and can get ideas for how to debug.


Function: calibrateCamera

Error Message:
OpenCV Error: Assertion failed (nimages > 0 && nimages == (int)imagePoints1.total() && (!imgPtMat2 || nimages == (int)imagePoints2.total())) in collectCalibrationData, file /opt/local/var/macports/build/_opt_mports_dports_graphics_opencv/opencv/work/opencv-2.4.8/modules/calib3d/src/calibration.cpp, line 3164

libc++abi.dylib: terminating with uncaught exception of type cv::Exception: /opt/local/var/macports/build/_opt_mports_dports_graphics_opencv/opencv/work/opencv-2.4.8/modules/calib3d/src/calibration.cpp:3164: error: (-215) nimages > 0 && nimages == (int)imagePoints1.total() && (!imgPtMat2 || nimages == (int)imagePoints2.total()) in function collectCalibrationData

Problem:
The objectPoints (or 3D points) and imagePoints (or 2D points) vector of vectors (the first two arguments to the function) are not the same length.

Fix:
Turns out I had 33 3D point vectors in my objectPoint vector of vectors, and 32 2D point vectors in my imagePoints vector of vectors (which is the correct amount). Adjust loops that fill these values to make sure they’re both 32. Used a print statement to sanity check the values to be accurate.


Function: calibrateCamera

Error:
OpenCV Error: Assertion failed (ni >= 0) in collectCalibrationData, file /opt/local/var/macports/build/_opt_mports_dports_graphics_opencv/opencv/work/opencv-2.4.8/modules/calib3d/src/calibration.cpp, line 3169

libc++abi.dylib: terminating with uncaught exception of type cv::Exception: /opt/local/var/macports/build/_opt_mports_dports_graphics_opencv/opencv/work/opencv-2.4.8/modules/calib3d/src/calibration.cpp:3169: error: (-215) ni >= 0 in function collectCalibrationData

Problem:
This one left me confused. It had to do with how I was filling my objectPoints (3D points) vector of vectors. I got this error when I tried to fill it by making a single vector of 3D points accurate, then duplicating that vector once within objectPoints for each image I had. In theory, the error tells you that the image count is 0. I confirmed that objectPoints was the correct length, so this is still a confusing error for me. AKA, I don’t really know the exact problem.

Fix:
I tried to make the first vector within objectPoints accurate, then used the vector resize function to duplicate that one vector <number of images> times:
objectPoints.resize(imageCount, objectPoints[0]);


Function: undistort

Error:
OpenCV Error: Assertion failed (dst.data != src.data) in undistort, file /opt/local/var/macports/build/_opt_mports_dports_graphics_opencv/opencv/work/opencv-2.4.8/modules/imgproc/src/undistort.cpp, line 173

libc++abi.dylib: terminating with uncaught exception of type cv::Exception: /opt/local/var/macports/build/_opt_mports_dports_graphics_opencv/opencv/work/opencv-2.4.8/modules/imgproc/src/undistort.cpp:173: error: (-215) dst.data != src.data in function undistort

Problem:
It checks if the source and destination Mats (the first two arguments) are the same; throws this error if they are.

Fix:
In my case, this meant that, like the destination Mat, the source Mat was empty…I had written a wrong pathname to get the image data I wanted to undistort. I just had to fix this pathname so that the source Mat was a valid (non-empty) Mat.


Function: calibrateCamera

Error:
OpenCV Error: One of arguments’ values is out of range (image width and height must be positive) in cvCalibrateCamera2, file /opt/local/var/macports/build/_opt_mports_dports_graphics_opencv/opencv/work/opencv-2.4.8/modules/calib3d/src/calibration.cpp, line 1477

libc++abi.dylib: terminating with uncaught exception of type cv::Exception: /opt/local/var/macports/build/_opt_mports_dports_graphics_opencv/opencv/work/opencv-2.4.8/modules/calib3d/src/calibration.cpp:1477: error: (-211) image width and height must be positive in function cvCalibrateCamera2

Problem:
The image size (the third argument) must have a positive width and height (read: cannot equal 0).

Fix:
I was doing an experiment to see if the “src” Mat I was repeatedly using in my loops to find chessboard corners in a group of images would behave better for me if .release()’d after every loop iteration. As a result, when I .size()’d it in calibrateCamera, it had a size of 0. I changed the src.size() argument to Size(max_col,max_row).


Function: calibrateCamera, findChessboardCorners, etc

Error: No specific message. When attempting to calibrate a stereo camera pair, I was having the oddest issue: running on my professor’s test images, I got imperfect but decent results. Running on my own, everything seemed totally screwed up. I eventually discovered that, for whatever reason, the chessboard corners on my images were being found in the opposite direction from the ones on the sample images.

Problem: The ordering of the found corners seems to depend on the orientation of the chessboard! In my images, the top left square is black…in the sample images I was provided, the top left square is white. Some googling found that others had seen this phenomena. Apparently this isn’t a consistent thing across the board…but it’s a start.

Fix: Create the objectImages 3D points vector of vectors backwards. In the loop that would create these points normally ascending (each “i” or “j” representing width or height being multiplied by the real-life size of each chessboard square), I needed to create them starting from the highest values and working down to 0’s. Incredibly. Annoying.


Function: calibrateCamera

Error:
OpenCV Error: Assertion failed (i < 0) in getMat, file /opt/local/var/macports/build/_opt_mports_dports_graphics_opencv/opencv/work/opencv-2.4.8/modules/core/src/matrix.cpp, line 963

libc++abi.dylib: terminating with uncaught exception of type cv::Exception: /opt/local/var/macports/build/_opt_mports_dports_graphics_opencv/opencv/work/opencv-2.4.8/modules/core/src/matrix.cpp:963: error: (-215) i < 0 in function getMat

Problem:
Arguments rvecs and tvecs are of type Mat.

Fix:
Make them type vector<Mat>.


Function: calibrateCamera

Error:
OpenCV Error: Bad argument (For non-planar calibration rigs the initial intrinsic matrix must be specified) in cvCalibrateCamera2, file /opt/local/var/macports/build/_opt_mports_dports_graphics_opencv/opencv/work/opencv-2.4.8/modules/calib3d/src/calibration.cpp, line 1592

libc++abi.dylib: terminating with uncaught exception of type cv::Exception: /opt/local/var/macports/build/_opt_mports_dports_graphics_opencv/opencv/work/opencv-2.4.8/modules/calib3d/src/calibration.cpp:1592: error: (-5) For non-planar calibration rigs the initial intrinsic matrix must be specified in function cvCalibrateCamera2

Problem:
I’m still not entirely sure what the happenings under the hood are for this problem, but the gist of it is that when you are calibrating the camera (a single camera) with 3D points (this is what is meant by “non-planar calibration rigs.” In other words, the “Z” coordinates in your objectPoints aren’t all equal to zero), there needs to be an initial value for your intrinsic parameters (the intrinsic matrix argument, cameraMatrix).

Fix:
At first I thought this meant cameraMatrix needed to be initialized in some way, even with zeros or something, but that’s not quite the case…you simply need to use the flag CV_CALIB_USE_INTRINSIC_GUESS in the flags argument of the function call. Note that writing any flags in this argument (it’s the last argument of the function call) will overwrite the default set of flags that would be added if none are specified–this has given me problems in the past.


Function: solvePnP, Rodrigues (the same error applied to both in the same way)

Error:
OpenCV Error: Assertion failed (0 <= i && i < (int)vv.size()) in getMat, file /opt/local/var/macports/build/_opt_mports_dports_graphics_opencv/opencv/work/opencv-2.4.8/modules/core/src/matrix.cpp, line 977

libc++abi.dylib: terminating with uncaught exception of type cv::Exception: /opt/local/var/macports/build/_opt_mports_dports_graphics_opencv/opencv/work/opencv-2.4.8/modules/core/src/matrix.cpp:977: error: (-215) 0 <= i && i < (int)vv.size() in function getMat

Problem:
This is essentially the opposite of the “(i < 0)” assertion problem I faced with calibrateCamera; unlike calibrateCamera, solvePnP and Rodrigues only take a single Mat and single vector of Points for the objectPoints, imagePoints, rvecs, and tvecs argument.

Fix:
Just append an index to each of these arguments (ie, rvecs[0]). You may want to iterate through your entire set of parameters, rather than just analyze them for a single image at a time.


Function: cvtColor

Error:
OpenCV Error: Assertion failed (scn == 3 || scn == 4) in cvtColor, file /opt/local/var/macports/build/_opt_mports_dports_graphics_opencv/opencv/work/opencv-2.4.8/modules/imgproc/src/color.cpp, line 3737

libc++abi.dylib: terminating with uncaught exception of type cv::Exception: /opt/local/var/macports/build/_opt_mports_dports_graphics_opencv/opencv/work/opencv-2.4.8/modules/imgproc/src/color.cpp:3737: error: (-215) scn == 3 || scn == 4 in function cvtColor

Problem:
The source doesn’t have the right color format that the code (third argument in the function call) indicates it should. In my case, I was attempting to “CV_RGB2GRAY” my Mat image, but I’d already loaded it “CV_LOAD_IMAGE_GRAYSCALE.” I was trying to convert a grayscale image from color to grayscale; so cvtColor expected my source image to be color. This is I believe what is meant by the “scn == 3” thing….somehow saying the source doesn’t have at least 3 color channels.

Fix:
Ensure that your source image is of the right color type to match the conversion process. In my case I brought in my images (when using imread) in color (code CV_LOAD_IMAGE_COLOR); I could also just bring them in in grayscale and skip the conversion entirely.


Function: VideoWriter.open, most any function with parameters

Error:
In this case, I wasn’t getting an error, which was part of the problem. However, the produced video would cause VLC media player to freeze if I attempted to watch it. The video file I attempted to produce was far too small for a video, as well.

Problem:
Opening a VideoWriter is sort of complex; you need the proper codex (argument 2, typically of format such as “CV_FOURCC(‘D’, ‘I’, ‘V’, ‘X’)”), and you need the proper flags (the 5th/final argument). Otherwise your video just turns into a mess.

Fix:
In my case, and I imagine the same is true a good amount of the time, the fix is to leave the 5th argument field (the flags) unfilled. As in, do not put an argument there at all–only have four arguments. Do not put zero. Zero means absolutely no flags; no argument field at all means default flags…and that is likely just fine.


Function: Rect (inside of matchTemplate, though that’s probably irrelevant)

Error:
OpenCV Error: Assertion failed (0 <= roi.x && 0 <= roi.width && roi.x + roi.width <= m.cols && 0 <= roi.y && 0 <= roi.height && roi.y + roi.height <= m.rows) in Mat, file /opt/local/var/macports/build/_opt_mports_dports_graphics_opencv/opencv/work/opencv-2.4.8/modules/core/src/matrix.cpp, line 323

libc++abi.dylib: terminating with uncaught exception of type cv::Exception: /opt/local/var/macports/build/_opt_mports_dports_graphics_opencv/opencv/work/opencv-2.4.8/modules/core/src/matrix.cpp:323: error: (-215) 0 <= roi.x && 0 <= roi.width && roi.x + roi.width <= m.cols && 0 <= roi.y && 0 <= roi.height && roi.y + roi.height <= m.rows in function Mat

Problem:
The region of interest I was attempting to pull out of an image by using Rect extended beyond the bounds of the original image.

Fix:
In my case I was using matchTemplate to try to track features, the Rect was intended to narrow the search window. I calculate the corners of the search window beforehand, and added conditionals to this calculation to bring the corner to an acceptable location on the edge (or appropriately spaced from it where necessary) if it attempted to go beyond it.


Function: findFundamentalMat

Error:
OpenCV Error: Assertion failed (mtype == type0 || (CV_MAT_CN(mtype) == CV_MAT_CN(type0) && ((1 << type0) & fixedDepthMask) != 0)) in create, file /opt/local/var/macports/build/_opt_mports_dports_graphics_opencv/opencv/work/opencv-2.4.8/modules/core/src/matrix.cpp, line 1486

libc++abi.dylib: terminating with uncaught exception of type cv::Exception: /opt/local/var/macports/build/_opt_mports_dports_graphics_opencv/opencv/work/opencv-2.4.8/modules/core/src/matrix.cpp:1486: error: (-215) mtype == type0 || (CV_MAT_CN(mtype) == CV_MAT_CN(type0) && ((1 << type0) & fixedDepthMask) != 0) in function create

Problem:
The status matrix that I was using as the final argument to findFundamentalMat  (available because I was using the FM_RANSAC flag) was a vector<int> instead of an OpenCV Mat. Why it is a Mat instead of a simple array is a mystery to me, but a Mat it must be.

Fix:
Make status a Mat, alter functions that utilize the info in status accordingly.


38 Comments

Filed under Coding, Tech

Trip Report: Provo Peak 2013

Without really thinking about it nearly as much as we should have, my roommate and I up and hiked Provo Peak a couple weeks back before the snow hit too hard. This was easily the least prepared I’ve ever been for a hike(saying something…I was once woken up at 7:00AM to be informed we were heading to Timp). The trail reports we found were somewhat lean, and gave a pretty wide range of ideas as to what the hike entails. We picked the route that seemed most common between them.

This was a pretty gruelling hike, and not just because of the difficulty, but because I managed to shoot myself in the foot in several ways. As I mentioned, lack of preparation abounded. We packed almost no food and very little water. I used some boots that I’d never worn before because it sort of crossed my mind that there might be snow this late in the year…there was. However, the boots were a double edged sword…the nickel sized blisters on the back of my ankles will testify to that. In addition, I was already fatigued from two intense volleyball games, a gym visit, and a poor night’s sleep. With these factors combined, I found myself for the first time considering turning back before I got the summit(I feel dirty just typing it). Enough of that…here’s how we did it.

IMG_2225

Yeah…not today.

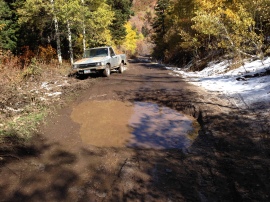
Near we could tell, the trailhead that starts fairly high up and allows you to climb the west ridge is the most popular one. Even getting to that point wasn’t easy. The road starts as Squaw Peak road, well paved and marked early into Provo Canyon. As you get to a t in the road you’ll go left, and continue past a campground onto a dirt road. After another stretch, another campground pulls off to the right, and a more intense dirt road is in front of you. This road is only passable with fairly high clearance vehicles…at this time of year, even my roommates fairly tough truck only took us so far. There were massive puddles and muddy ice all over. We had to stop in front of a fairly nasty dip surrounded by ice, and started walking. Thankfully a couple in a jeep grabbed us partway and took us to the trailhead, as we had a ways to go.

The beginning of the trail is similarly poorly marked, but you should be able to tell when you get there. There’s a bit of an area you could pull off into and park, and a couple trails leading away from it. You’re in a sort of low saddle between peaks, and the one roughly east of you is Provo Peak. The hike is basically a straight shot up the west ridge, so you can see this “parking” area for almost the entire hike, which is helpful in knowing where you are. In the direction of the peak from the parking area you’ll see a four-wheeler looking trail headed up that you’ll start on.

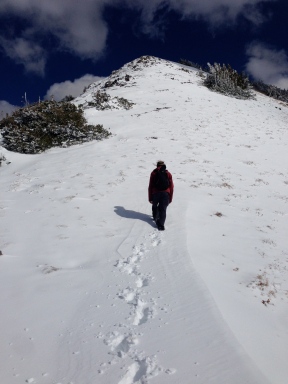
Keep an eye out for a cairn on this trail; this is where we pulled off to start heading more uphill. This is also where I become less confident in helping you identify where the trail was, as it was mostly snowy for us. We followed what we assumed was a rough trail, though it felt like it was mostly used by animals. It was basically clear of plants though, and headed uphill towards the right peak. I would say about half the hike was weaving on these loose switchbacks, and the latter half was just aiming towards the summit and moving forward. For us, the latter half was at least 6″ of snow, and was fairly brutal.The grade was pretty steady, and at one point I used a level app on my phone to get a rough estimate of the incline: around 30 degrees. In addition, there are a 2-3 false summits to try and break your spirit. Eventually the true summit, marked with what appeared to be a broken weather vane of sorts, came into sights.

IMG_2235

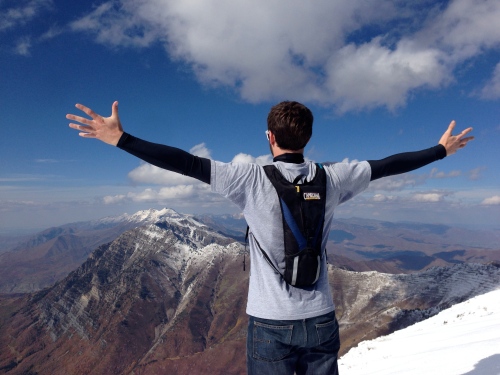
Speaking of sights, they’re fantastic. It didn’t hurt at all that we went in the middle of autumn…the tallest mountains around had snow caps, just a little ways down was a beautiful canvas of green, red, yellow, and orange. The cities and lakes of Utah Valley on our west, mountains stretching out to the east. Provo Peak is definitely an under-appreciated summit. We found a peanut butter jar converted to a registry and wrote our names there and in the snow before heading down.

As tempted as I had been to quit trudging up the snowy slope, sliding down it more than compensated for the struggle. Especially towards the top where the snow was colder and deeper, we just sat and pushed our way down. This did get somewhat dangerous as we got lower; rocks poked up more, and a more careful technique had to be employed to take advantage of the slick terrain. I was once again grateful for my thick boots at this point, as it seemed as though they were impervious to the snow and sharp rocks as I rested on them to slide down.

We made a fairly bad choice on the trail down: we tried to shortcut to the road. We knew we had a fairly long walk ahead of us to my roommate’s truck, and we could see the road from above, so we aimed right for it instead of taking the same trail down to the parking area. This was mostly fine, as we had steeper paths with snow that we could slide down, but as we got to within about 200 yards of the road, the brush got extremely thick. For about 50ft it turned nearly impassable. My advice: stick to the relatively poor but overall clear trail you took up.

We did make it to the road, walked another half mile or so to the truck, and drove home cold, sore, and muddy (the snow was more melted in some areas than others!). Totally worth it.

Provo Peak isn’t a long summit hike, assuming you’re able to drive all the way to the parking area I’ve described. It is, however, very, very steep, and not terribly popular–which means the trail isn’t well defined. I couldn’t find really consistent reported data on the elevation gain in any trail reports, but through my own research it looks like you travel roughly 1.31 miles up a (11,068 – 8337 = )2,731ft elevation gain… that’s gives us a somewhat unreal average slope of 39.5%!!! This is by far the steepest hike I have done, with Olympus coming in at a far 2nd of 21%. We were able to ascend in about 3 hours, and slide down in about 1.5. The rough and snowy dirt road getting up there makes the travel time fairly long, and I think it took us a total of around 6 hours. This is probably a decent total time for those going in summer and starting from the parking area…we didn’t have these luxuries, but we also took the trail quickly, didn’t take breaks, and were able to slide much of the way down.

This was a very rewarding hike, but I’d suggest getting some amount of training in before tackling it…and don’t be as unprepared as we were!

IMG_2241

Leave a comment

Filed under Trip Reports

AirPlay mirroring on Raspberry Pi with rPlay

Note (2.22.18): Thank you to anyone who has stumbled across my site and is reading this message. I’m humbled by the impressive amount of traffic this page continues to see after so many years–there is clearly a lot of interest in AirPlay mirroring without need of an Apple TV.
The forums at VMLite continue to receive requests for rPlay licenses, but I haven’t seen a reply from an admin for quite some time. I’m not sure if the rPlay project is still supported or even exists. Having said that, I have sent an email to my contact there to see if he has anything to say on the matter. I have since gotten pretty interested and involved in some simple smart home projects. Many of them have involved use of a Raspberry Pi, and I may find a chance to see if I can’t figure out a new way to AirPlay mirror on these impressive devices. I’ll update with any success or response from the guys at VMLite.

Update (9.21.15): VMLite informs us in the comments that a new version of rPlay will be available by next month! iOS 9 support has been figured out, and this new (likely paid) version will eliminate the internet based license check. Chromecast mirroring is also in the works!

A friend of mine has been talking about buying an Apple TV lately, mostly so he could use the AirPlay mirroring functionality. Airplay allows you to mimic what’s happening on your recent generation iDevice or Macbook on your TV wirelessly–watch YouTube, show pictures, play music, even ‘mirror’ the screen exactly. I’d heard somewhere that AirPlay was possible with a Raspberry Pi, and started looking into it.

I soon found that many devices will do music and sometimes even YouTube videos over AirPlay, but mirroring is typically only possible on an actual Apple TV. However, I came upon this YouTube video that showed a guy(and his killer accent!) that had pretty recently managed that very thing. The program is called rPlay, from a company called VMLite.

At the time of writing, rPlay is in beta. You’ll need to go to the forums and make a post or e-mail the developers(info@vmlite.com) to request a license key, without which you’ll be unable to use mirroring(though the guys at VMLite informed me other AirPlay functions will work without one!) . I was a bit late to the game, but emailed a request, and within about a day had a key and some basic instructions in my inbox.

I write this tutorial for a couple reasons. First of all, the instructions didn’t cover some common errors. Like me, you’ll likely run into some hiccups and need to do a couple extra things to get everything working. Second, this was my first RPi project, and if you’re in the same boat, you may appreciate a bit of extra info to get you started. This is written from a beginner’s perspective.

Getting your Raspberry Pi running

This section is for those starting at the beginning–first time RPi users. If this doesn’t apply to you, skip ahead. 

I was able to get things started up using this tutorial on Engadget, and I suggest you do the same. However, there’s a couple things I’d like to add.

When securing your power supply, ensure that it’s not only 5V, but also outputs at least 700mA. Your SD card will need to be at least 2GB, and there are lots of reasons to get different types or memory capacities if you want to do a bit of research and decide what your needs are. Also, you technically don’t need the USB mouse if you truly intend to only use the Pi for AirPlay, but odds are you want to tinker more than that. Otherwise, you can pick almost all of it up for $10 or less each online(assuming you don’t have the supplies already, which you likely do). A Model B Pi is recommended for rPlay; VMLite reports it performs much better with it’s larger RAM(512MB vs 256MB on the Model A). However, if you do use a Model A, note that you’ll probably need some extra things, like a USB hub and wi-fi dongle.

I followed most of their guide to install a compatible OS image on your SD card. Their link for the downloads didn’t serve me; I got mine from here, and got the newest Raspbian “wheezy” image. The email instructions I received said rPlay runs on a “dumb terminal.” I wasn’t sure what this meant, but I think rPlay will work with any image you’d like, since you’ll only really need the command line(note that there are some differences in how some images use rPlay!). By the way, I used the torrent option with uTorrent…it made a world of difference for download speed and stability.

(Note: I was using the Mac instructions–the following might be slightly different for Windows or Linux)Later in the process of loading the SD card you’ll need to alter Engadget’s instructions so that the name of your image reflects the name of the image you downloaded, the most recent one, not theirs from 2012-06-15. Also, when they talk about ‘converting’ the name of your disk, that is happening automatically. You don’t have to change the name of anything, they’re merely informing you that it has changed so you can type in the correct things.

After loading the image, I followed their advice on booting for the first time and setting things up. Couple things to note here…first, the layout of the configuration menu has changed, and some features you’ll want to access are layered in the “Internationalization Options” and “Advanced Options” menus. Also, step 2 of ‘getting rPlay running’ can be done while in the config menu now, if you want to get it out of the way. I didn’t continue from where they encouraged you to start the GUI after rebooting; again, you’ll load rPlay with the command line.

Getting rPlay running

You have your RPi running and ready to go…now to get to the good stuff. This will largely be the instructions given to me in an email that included the license key, and all the extra bits I add are mostly tips I got from the rPlay bug fixes on the VMLite forums.

This will all be done from the command line; just type things in. Some steps may not be necessary, but I typically favor doing all that you can to ensure no problems arise along the way.

Note that I’m using the Raspbian image; I’ve been told some steps vary a little. I’ll note ones I’m aware of.

1. Update the firmware of your RPi.

sudo apt-get install rpi-update

sudo rpi-update

This may take a couple minutes, but this step gave me no problems. The first line gets your updater, the second runs it.
Note: “sudo” is a common command line element; it gives unrestricted access to the system when entered before a command, and most things we’re doing won’t work without it.

2. Allocate maximum memory to the GPU.

AirPlay is a graphics intensive function, and you’ll need all hands on deck to run it on your RPi with it’s relatively low computing power. You may have already done this as you were configuring your RPi for the first time; if not, enter the configuration menu with

sudo raspi-config

Go to ‘Advanced Options,’ then ‘Memory Split.’ Delete whatever number was previously there, and allocate 256 for your model B Pi, or 128 for a model A(half the total RAM), and confirm the change. I think I rebooted here even though I don’t think you’re encouraged to; again, I just like to cover my bases.

3. Download some necessary libraries/apps rPlay depends on.

First, load what you’ll need:

sudo apt-get install libao-dev avahi-utils libavahi-compat-libdnssd-dev libva-dev youtube-dl

Then, if the previous command reports no errors, update YouTube (note: the dash before update in the following command is a double dash):

sudo youtube-dl –update

Here’s where I first ran into problems; I got some “404” errors when running apt-get; I’m not sure any of the dependencies(there’s five there, separated by spaces) properly loaded. If you had problems, try this command:

sudo apt-get -f install

Then try to install the dependencies again. A clue that you need to use this line, besides seeing errors, is that the YouTube update won’t work(you can’t update something you don’t have). I actually had to repeat some things; I thought all was well, but then I’d try to continue and it would say I didn’t have the necessary dependencies, encourage me to use the ‘-f install’ command, etc. If the YouTube update works correctly, you may get a message saying something about how the distribution method had changed; press enter to continue, and it will report that youtube-dl can now be used. You should be ok to continue.

4. Download rPlay and run.

wget -O rplay-1.0.1-armhf.deb http://www.vmlite.com/rplay/rplay-1.0.1-armhf.deb

sudo dpkg -i rplay-1.0.1-armhf.deb

First command is the download, second is the install. Here you’re likely to run into problems if everything from step 3 wasn’t settled. I believe you need to reboot at this point; rPlay is set to auto-start. Note that anytime rPlay starts, you’ll get three warnings from Avahi about not using their native this-and-that…VMLite assures beta testers these are ‘benign’ warnings, and not to worry about it.

5. Validate rPlay with a license key.

Now time to make things legit; mirroring won’t work without validating your RPi to use rPlay(not sure if other AirPlay functions might? I didn’t experiment — Update: I mentioned this before, but the guys at VMLite have told me other features DO work without a license!). You’ll do this on the web, and you can do it on your RPi if you want(use command ‘startx’ to bring up the GUI and use the Midori web browser), but I just did it on my laptop for simplicity. Don’t use Safari for your browser here; VMLite tells me you’ll run into bugs. If you do it on your RPi, replace your RPi’s IP(which is given to you as you boot up, look for it just above the log-in info request) with “localhost.” Type the following URL into your browser:

http://<ip of your RPi>:7100/admin

The username and password are ‘admin.’ Scroll to the bottom where you can enter your key, click submit, and you’ll get a confirmation. If you want you can edit the other options on this admin page. You can also do all this by editing /etc/rplay.conf via the command line with the ‘append’ command. Plus you can be paranoid like me, and reboot…again 🙂

You’re ready to try it out!

6. Try out AirPlay!

With your RPi ready to go, bust out your iDevice and turn on AirPlay. On iOS 7, you drag your control center up from the bottom, and the AirPlay option should be located on the same line as AirDrop. Select your Pi as the device, and activate mirroring if you want to play with that. In video playing apps, you’ll typically need to select the output device again from within the app to push only the video to the screen(separate from mirroring). Whatever feature you decide to play with, your video and/or sound should be running to whatever is hooked up to your Pi! The method is similar for an iPad or Apple computer. There is some limited support on Android devices as well; they’ll recognize your RPi as a Chromecast(VMLite has also made an iOS app, titled rplay, that will allow your iDevice to act as a Chromecast!).

Troubleshooting Tips

  • For Raspian, AirPlay will function at any time(command line, GUI, etc), but this isn’t universally true. For XBMC images like RaspBMC or Xbian, for example, you’ll need to exit XBMC to the command prompt. Other images may have other requirements.
  • Remember that your RPi and iDevice need to be attached to the same network, in other words, the same router. Most people have a hard time getting things working on school or work networks.
  • In my experience, leaving the range of your wi-fi while your device is still mirroring is a great way to make sure your RPi completely freezes.
  • When I updated to iOS 7, I needed to update all my libraries(sudo apt-get update) and restart rPlay(sudo /etc/init.d/rplay stop; sudo /etc/init.d/rplay start). Prior to this my Pi wasn’t showing up on the AirPlay menu. Even after the fix, things are buggy and sometimes fail. I’m still hunting for a solution to this, and it may come with the next rPlay update.
  • Remember that your Pi will need to have the ethernet and HDMI cables hooked up at boot time. I regularly fiddle with my router, and this has been a frequent annoyance(I can’t figure out why AirPlay refuses to show up for my Pi).

Limitations

As I mentioned, rPlay is in beta. You’re unlikely to see perfect performance. I’ll outline what I was and wasn’t able to accomplish. I originally thought many of my issues were due to the terrible internet in my apartment, but we’ve since gotten a rather good upgrade, and I’ve seen little change.

I was able to get mirroring working pretty well on my iPhone 5. I could definitely notice a delay between what was happening on my phone vs. the screen, but it wasn’t bad. The edges of my iPhone’s screen seemed to be cut off a little on the big screen. Music seemed fine, photos, etc. However, using YouTube and Netflix were laggy and very, very low resolution(I think the bettered internet speed helped the resolution a bit, but there were still syncing problems).

Without mirroring, YouTube via AirPlay worked rather well. You can’t try to navigate around too quickly, you may encounter some issues if you do(possibly including freezing). I couldn’t change the position of the  playback, for example, but I was able to get videos to play mostly without issue(certainly better than over mirroring, no audio/video out of sync problems). No problems viewing native pictures, videos, or playing music. However, Netflix wouldn’t load a video at all(much to my chagrin).

I did a quick experiment to use Chromecast, but wasn’t able to get anything to happen. VMLite acknowledges the Chromecast support is sketchy, but they are actually working on an app that will allow your iDevice to route Chromecast signals from an Android device to AirPlay.

Conclusion

I was pretty pleased when I was able to get things working, and I hope you’re successful too.

I’d love some feedback from others working on this. If you know some ways to fix problems I had, had problems of your own, or just noticed some mistakes or something out of date about my tutorial, please comment and I’ll do my best to keep things accurate.

Hopefully VMLite will continue to improve the rPlay experience and I can continue to report improvement from here on out.

Enjoy your Pi!

Update (2014-06-16): I’ve reached out to VMLite recently to inquire about the future of rPlay. Unfortunately, there isn’t much to report…I’m told we still have a while to wait before a full version is released, and they’re focusing somewhat on Android capabilities. However, this is a bit previous, and I will email them again to see if I can get more recent news.

Update (2013-09-20): iOS 7 has brought with it some challenges for developers that are affecting rPlay(in addition to the hiccups still remaining on the beta version). I’m having a hard time getting things to work consistently, and several others on the forums are reporting the same.

133 Comments

Filed under Tech, Tutorials

Trip Report: Spanish Fork Peak 2013

One day while using Google Maps for something else, I happened to spot a marking for “Spanish Fork Peak.” It caught my attention, I looked into it, and Dan and I decided to hike it this last week. Coming across it on the map turned out to be sweet serendipity, as the summit trail has definitely risen on my list of favorites. The hike is rather difficult, and isn’t terribly popular, but the trailhead is easy to access, the views are fantastic, and it’s overall a very rewarding hike. The information about the trail is fairly limited on the net, so hopefully I can fill in gaps for those interested.

The trailhead is just a couple miles up the canyon from Mapleton, UT. Head east on 400 N, into the canyon, until you reach Whitings Campground. The trailhead is at the end of the campground, with free parking and a bathroom for hikers. We started the trail at 7:30AM to some great weather.

The trail appears to continue forward; you need to go right.

The trail appears to continue forward; you need to go right onto that log bridge you can see.

The trail starts very wide and gravelly, possibly a service road, and only about 1/3 of a mile in you need to turn right off this road to continue towards the summit(I don’t know where the service road continues to). This isn’t obvious, to the point where I considered us somewhat lucky that we didn’t miss it. As long as you keep an eye out, you should spot it: there’s a log bridge over a stream and a sign indicating the trail is 5 miles from that point.

From here you might just start to get discouraged. After a fairly flat beginning, the trail starts to go up, in a big way. Dan and I are both very active hikers, and this first uphill left us pretty strained. Don’t give up, though; this is probably the most challenging part. There are other plenty steep stretches, but none as long.

Who turned the steep up?!

Who turned the steep up?!

As you make it past the first struggle, you’ll end up in some fairly thick vegetation. Online sources had me convinced the entire trail was about the same steepness(which made that first bit even harder to get through), but you’ll see that isn’t entirely true. The middle section actually has some up and down, though mostly up. You’ll see a poor campsite or two, some places where animals have clearly been resting, some heavily wooded areas.

On that note, you would not be amiss bringing a machete on this hike…we wish we had. There are a few portions where the branches or weeds surrounding the trail were very thick and obtrusive. The trail doesn’t ever really disappear, but there are a couple times where you’ll start to question it with how thick the vegetation is. This is not a popular hike. We saw more signs of wildlife than human life, which, unless you count a couple fire pits,  included an older woman and her dog near the trailhead(who I highly doubt summited) and a couple tents a bit off the trail.

Eventually you’ll come to a valley with a small pond. I suppose this could disappear at some points in the season, depending on how dry the year is, but you’ll likely still see some signs of a small body of water as you come downhill for a short portion. Then you’ll head back up into a massive field of yellow flowers(assuming you go around this time of year), then into a huge canyon bowl. We started to wonder where the heck the trail went off to at this point…it looked like there was nowhere to go but up! But sure enough, the trail sneaks onto a gravelly set of steep switchbacks, which is probably the second most difficult portion of the hike.

As you finish off the switchbacks you’ll be greeted with a great view of Utah Valley from the saddle. At this point you can go right(north) on a trail, but it only leads to a lower peak. We choose try it out anyway for some reason, deciding we were “hipster hikers.” It was a short trail and we got a small taste of the glory to come. However, you’ll probably just want to start left(south) right away to achieve the summit. Word of caution at this point!!

Take the more prominent trail on the right at the saddle, unless you want to feel at one with the mountain goats.

Take the more prominent trail on the right at the saddle, unless you want to feel at one with the mountain goats.

Choose the right! We continued our hipster trend and decided to try out both paths here…I drew the short stick. I think the trail on the left that I took is used by mountain goats more often than people, based on how stupidly steep it is. It was a bit faster than the trail that Dan took(it travels directly over a smaller hill between you and the summit, rather than around it, like the trail on the right), but I’d submit overall not worth it. 

Once you get to where the two trails meet up at a trail marker, you’ve got a short steep run to the top, where a huge cairn and A-frame type structure await you. For the record, there is a register, but there weren’t any pens/pencils in it…make due preparations! Otherwise enjoy the summit. You can see Timp to the north, Nebo to the south, much of Utah Valley to the west, and loads of mountains to the east.

Nothing more satisfying...

Nothing more satisfying…

...than the summit lunch.

…than the summit lunch.

We decided to trail run our way down. Both Dan and I are also regular runners, and it was a lot of fun. If you choose the same method, just make sure to pay lots of attention to your footwork. Lots of side-steps during steeper portions, and careful steps with rocks around. Your knees will likely start to feel some wear and tear, and your ankles are at risk of some serious injury. Taking the right precautions, you can enjoy some sweet parkour-like action and some good cardio.

Siesta

Spanish Fork Peak trail is, we decided, definitely “not yo mamma’s hike.” Ascending about 4,600ft over 5.5 miles gives an average 16% grade, making this a fairly tough combination of length and steepness. We were at the trailhead by 7:30AM and were driving away by 1:45PM, for a total of 6 hours. Now, this is sort of a skewed time…we took the trail very quickly, and ran the entire way down(3 hours up, 1.5 down). However, we also decided to hit the side peak, and may or may not have taken a 1.5 hour siesta at the summit. So, balancing things out, I’d guess 6-7 hours is about how long you should expect this fantastic summit hike to take you.

Leave a comment

Filed under Trip Reports

Trip Report: Mt. Olympus Peak 2013

After sharing my Timp experience and love of hiking, another friend and I made plans to summit Mt. Olympus in Salt Lake. Olympus is unique to most hikes I’ve done in that it’s right next to the city…the trailhead is a couple minutes off the freeway, at 5789 Wasatch Boulevard. It’s also exceptionally short horizontally…but exceptionally steep vertically.

We met at the trailhead just after 8AM and started climbing. The first stretch gets you warm right away, with fairly steep steps for a few dozen meters. As you get to the top of Pete’s Rock(a tall, prominent rock that you could rock climb from the trailhead), you’ll likely see a little trash and a small fire site…and then realize you took one of many, many alternate or false trails along this summit hike.

"Clearly I need to continue the trail to the left." You'd be wrong. The trail continues on the right, up the rocks. One of many poorly marked trail forks on the road to Olympus.

“Clearly I need to continue the trail to the left.” You’d be wrong. The trail continues on the right, up the rocks. One of many poorly marked trail forks on the road to Olympus.

We continued past the small hang out site on the trail, but thankfully, we quickly thought there was something wrong about continuing downhill. I climbed up Pete’s Rock a ways and saw the summit trail continue uphill once you climb up the rocks there. This is something you have to pay attention to on this hike: there are several spots where an alternate trail(apparently leading to the Bonneville Shoreline, most of which are marked with a small sign) or a false trail branches from the main one. The latter of which are typically not marked at all(except maybe a couple rocks on the trail that don’t help deter much, as you may, or may not, have spotted in the above photo), usually aren’t very good paths, and take you a bit further, but ultimately lead back to the main trail. If you think the trail suddenly became pretty poor, there’s a chance you’ve taken one of these. 

After the initial steep steps, the trail becomes pretty mild for a while on some switchbacks. Starting this early makes almost the entire ascent shaded, as the sun hasn’t come up over the west side of the mountain yet(the picture above was taken as we descended). You’ll go probably around 2 miles in these sort of conditions. After about that length, one member of our group decided his back had had enough, and chose a shady spot on the side of the trail to wait. He choose a great spot.

Shortly after we continued, Olympus became a true beast. Let there be no mistake: Olympus is a rigorous peak to summit. For probably another mile we went up a steep incline(probably averaging around 30%) in thick vegetation until we reached a sort of saddle. The trail levels out for a short while, you’ll see a few small camp/fire sites and a fantastic view directly ahead.

Views from the saddle are already getting good.

Views from the saddle are already getting good.

The trail continues left, and doesn’t get easier….from here on out, you’re bouldering/climbing to the summit. There were a few cairns to mark the way, but none extremely helpful(we added a couple). After you start heading north at the saddle, you’ll continue north and somewhat east until the summit. There’s never a point where you’re truly rock climbing on a level 5 wall, but you will be using your hands and pulling yourself up much of the way, like a giant staircase to the top.

We weren't expecting such a rock face to have to scramble up!

We weren’t expecting such a rock face to have to scramble up!

At the very top you’re almost exclusively hiking on large boulders, and there will be a few registry notebooks in a mailbox for you to sign. We were able to summit just around noon, to great weather. No wind, no clouds, and not too hot. We enjoyed some lunch and the views before descending. The views cover Salt Lake Valley, some smaller mountain ranges to the north, and some other taller summits to the south.

Can you spot our little friend?

Can you spot our little friend?

Any hike tends to be fairly abusive on the legs on the way down, but that was especially true for Olympus. Creeping down the boulders at the top wasn’t too bad, but that mile or so of steep, rocky trails downward required careful attention to footwork to make sure there were no ankle or knee injuries. We met up with our friend about halfway down and took the rest of the fairly mild trek down. We were in bright sun for most of the descent, and it was starting to get hot at this point. We all ran out of water, but only when we were nearly done(I think most of us brought a typical 2 liter camelbak). Few things match the feeling of reaching the top….and bottom….of a good summit hike.

Mt. Olympus is roughly 3.75 miles both ways, for about a 7.5 mile/12 kilometer round trip. This is, for it’s short distance, a very difficult hike, averaging a 21% grade. In comparison, Timpanogos averages 11%, and Nebo 15%; the three peak hikes cover similar heights over widely different stretches. I find the time to ascent vs. the time to descent for most hikes is much closer than I would think, but Olympus took almost twice as long to climb than to return(just under 4 hours compared to just over 2). We began at about 8:10AM, summited at 12:05, began climbing down around 12:30, and reached the parking lot near 2:45, for a total of just less than 7 hours. Cell service was strong the whole trip.

The views weren’t quite what King’s Peak or Mt. Nebo offer, but Olympus has advantages in the proximity of it’s trailhead and as a great workout in less of a time commitment. The path isn’t as clear as I’d have liked in some places, but still isn’t difficult to follow. With the steepness and climbing portions near the end, inexperienced hikers, kids, and maybe even some dogs may have a hard time reaching the summit. The parking closes between 10PM and 6AM, and the hike is pretty short, but there were spots where I imagine you could camp at the saddle if you wished.

1 Comment

Filed under Trip Reports